资源下载
资源下载

无线通信——nRF24L01与Arduino的接口

文件列表(压缩包大小 2.77M)
免费
概述
需要的元件
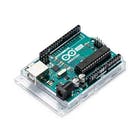
Arduino UNO
NRF24101模块
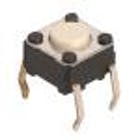
SparkFun按钮开关12mm
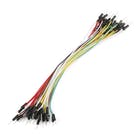
杜邦线
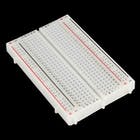
面包板
LED

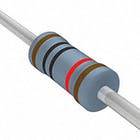
电阻221Ω
Arduino IDE

原理及流程
关于这个项目
在本教程中,你将在两个示例的帮助下了解有关nRF24L01 Arduino接口的信息。在第一个示例中,我们将发送“ Hello world”和一个命令,以使连接到另一个Arduino的LED闪烁。在第二个示例中,我们将进行双向控制,并从第一个Arduino发送命令以使第二个LED闪烁,然后从第二个Arduino发送命令以使第一个Arduino闪烁。
在详细介绍之前,首先请看一下该模块的规格
nRF24L01模块
nFR24L01是收发器模块,这意味着它既可以发送也可以接收数据。
这些模块非常便宜,尺寸更小,规格很多。这些模块的一些规格如下
nRF24L01模块的规格
- 传输期间的功耗约为12mA,甚至比led还要小。
- 它可以以250Kbps至2 Mbps的波特率运行。
- 如果在开放空间和天线中使用,其范围可达100米。
- 它可以同时发送和接收数据。
- 每个模块最多可以与6个其他模块通信。
- 它使用2.4 GHz频段。
- 它可以以1 MB的传输速率发送1到25字节的原始数据。
- 它具有125个不同的频道。
引脚排列
nRF24L01模块通过SPI通信与Arduino配合使用。模块的引脚排列如下

该模块的工作电压为1.9至3.6V,但其他引脚的耐受电压为5V,这意味着其他引脚可以直接连接至Arduino。
MOSI,MISO和SCK是SPI引脚,需要将它们连接到Arduino的SPI引脚。不同的Arduino具有不同的SPI引脚。
CSN和CE用于将模块设置为活动模式,并用于在命令和发送模式之间进行切换。这些可以连接到Arduino的任何数字引脚。
IRQ引脚是中断引脚,你不必连接它。
示例1-nRF24L01 Arduino接口
在第一个nRF24L01 arduino接口的示例中,我们将简单地将数据从一个Arduino发送到另一个Arduino。当我们按下连接到第一个Arduino的按钮时,连接到第二个Arduino的LED将点亮。
下面显示第一个示例的电路图,下面显示连接。

发射器代码
从下载区或https://github.com/nRF24/RF24.git下载nRF24L01库
#include <SPI.h>
#include <nRF24L01.h>
#include <RF24.h>
RF24 radio(9, 10); // CE, CSN
const byte address[6] = "00001";     //Byte of array representing the address. This is the address where we will send the data. This should be same on the receiving side.
int button_pin = 2;
boolean button_state = 0;
void setup() {
pinMode(button_pin, INPUT);
radio.begin();                  //Starting the Wireless communication
radio.openWritingPipe(address); //Setting the address where we will send the data
radio.setPALevel(RF24_PA_MIN);  //You can set it as minimum or maximum depending on the distance between the transmitter and receiver.
radio.stopListening();          //This sets the module as transmitter
}
void loop()
{
button_state = digitalRead(button_pin);
if(button_state == HIGH)
{
const char text[] = "Your Button State is HIGH";
radio.write(&text, sizeof(text));                  //Sending the message to receiver
}
else
{
const char text[] = "Your Button State is LOW";
radio.write(&text, sizeof(text));                  //Sending the message to receiver
}
radio.write(&button_state, sizeof(button_state));  //Sending the message to receiver
delay(1000);
}
接收方代码
#include <SPI.h>
#include <nRF24L01.h>
#include <RF24.h>
RF24 radio(9, 10); // CE, CSN
const byte address[6] = "00001";
boolean button_state = 0;
int led_pin = 3;
void setup() {
pinMode(6, OUTPUT);
Serial.begin(9600);
radio.begin();
radio.openReadingPipe(0, address);   //Setting the address at which we will receive the data
radio.setPALevel(RF24_PA_MIN);       //You can set this as minimum or maximum depending on the distance between the transmitter and receiver.
radio.startListening();              //This sets the module as receiver
}
void loop()
{
if (radio.available())              //Looking for the data.
{
char text[32] = "";                 //Saving the incoming data
radio.read(&text, sizeof(text));    //Reading the data
radio.read(&button_state, sizeof(button_state));    //Reading the data
if(button_state == HIGH)
{
digitalWrite(6, HIGH);
Serial.println(text);
}
else
{
digitalWrite(6, LOW);
Serial.println(text);}
}
delay(5);
}
视频
[视频](Arduino Wireless Communicatin_哔哩哔哩 (゜-゜)つロ 干杯~-bilibili)
示例2-nRF24L01 Arduino接口
在Arduino接口nRF24L01的第二个示例中,我们将进行双向通信。首先,我们将从第一个Arduino发送命令以点亮连接至第二个Arduino的LED,然后我们将从第二个Arduino发送命令以点亮连接至第一个Arduino的LED。

第一个Arduino的代码
#include <SPI.h>
#include <nRF24L01.h>
#include <RF24.h>
RF24 radio(9, 10); // CE, CSN
const byte addresses [][6] = {"00001", "00002"};  //Setting the two addresses. One for transmitting and one for receiving
int button_pin = 2;
int led_pin = 3;
boolean button_state = 0;
boolean button_state1 = 0;
void setup() {
  pinMode(button_pin, INPUT);
  pinMode(led_pin, OUTPUT);
  radio.begin();                           //Starting the radio communication
  radio.openWritingPipe(addresses[1]);     //Setting the address at which we will send the data
  radio.openReadingPipe(1, addresses[0]);  //Setting the address at which we will receive the data
  radio.setPALevel(RF24_PA_MIN); //You can set it as minimum or maximum depending on the distance between the transmitter and receiver.
}
void loop()
{
  delay(5);
  radio.stopListening();                             //This sets the module as transmitter
  button_state = digitalRead(button_pin);
  radio.write(&button_state, sizeof(button_state));  //Sending the data
  delay(5);

  radio.startListening();                            //This sets the module as receiver
  while(!radio.available());                         //Looking for incoming data
  radio.read(&button_state1, sizeof(button_state1)); //Reading the data
  if (button_state1 == HIGH)
  {
    digitalWrite(led_pin, HIGH);
  }
  else
  {
    digitalWrite(led_pin, LOW);
  }
}
第二个Arduino的代码
#include <SPI.h>
#include <nRF24L01.h>
#include <RF24.h>
RF24 radio(9, 10); // CE, CSN
const byte addresses [][6] = {"00001", "00002"};    //Setting the two addresses. One for transmitting and one for receiving
int button_pin = 2;
boolean button_state = 0;
boolean button_state1 = 0;
int led_pin = 3;
void setup() {
  pinMode(led_pin, OUTPUT);
  Serial.begin(9600);
  radio.begin();                            //Starting the radio communication
  radio.openWritingPipe(addresses[0]);      //Setting the address at which we will send the data
  radio.openReadingPipe(1, addresses[1]);   //Setting the address at which we will receive the data
  radio.setPALevel(RF24_PA_MIN);            //You can set it as minimum or maximum depending on the distance between the transmitter and receiver.
}
void loop()
{
  delay(5);
  radio.startListening();                    //This sets the module as receiver
  if (radio.available())                     //Looking for incoming data
  {
    radio.read(&button_state, sizeof(button_state));
    if(button_state == HIGH)
  {
     digitalWrite(led_pin, HIGH);
  }
  else
  {
     digitalWrite(led_pin, LOW);
  }
  delay(5);

  radio.stopListening();                           //This sets the module as transmitter
  button_state1 = digitalRead(button_pin);
  radio.write(&button_state1, sizeof(button_state1));   //Sending the data
  }
}
视频
最后
所有需要的文件在下载区均可找到。
理工酷提示:
如果遇到文件不能下载或其他产品问题,请添加管理员微信:ligongku001,并备注:产品反馈

评论(0)

0/250